
Genshin Impact Dori guide and tips for the ultimate character building
A detailed guide on the Electro character

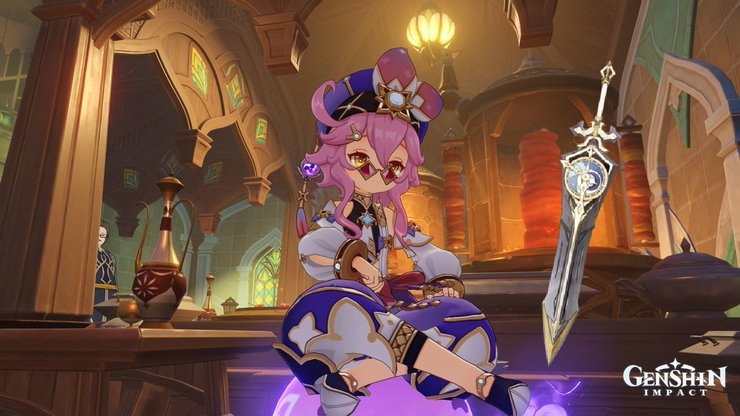
Dori is an Electro support character in Genshin Impact, the famous open-world RPG by HoYoverse. Dori was added in Genshin Impact in the latest 3.1 update. We have seen Genshin Impact add a new element, Dendro in the 3.0 update. The addition of Dori as the latest Electro character will create a vast chance for the players to try out new team compositions. Dori is a strong support character with decent healing and energy regen abilities. In this article, we will provide you with the best guide for Dori build with weapons, artifacts, and more in Genshin Impact.
Dori’s skill talents
Normal attack
Perform up to 3 consecutive strikes.
Charged attack
Drains Stamina over time to perform continuous spinning attacks against all nearby opponents. At the end of the sequence, performs a more powerful slash.
Plunging attack
Plunges from mid-air to strike the ground below, damaging opponents along the path and dealing AoE DMG upon impact.
Elemental Skill – Spirit-Warding Lamp: Troubleshooter Cannon
Directs a Spirit-Warding Lamp to fire off Troubleshooter Shots at opponents, dealing Electro DMG.
When Troubleshooter Shots hit opponents, they will create 2 After-Sales Service Rounds that will automatically track opponents and deal Electro DMG.
Elemental Burst – Alcazarzaray’s Exactitude
Summons forth the Jinni within the lamp to give the client various kinds of aid.
Jinni
Connects to a nearby character. The connected character will:
- Continuously restore HP based on Dori’s Max HP.
- Continuously regenerate Energy.
- Be affected by Electro.
When the connector between the Jinni and the character touches opponents, it will deal one instance of Electro DMG to them every 0.4s.
Only one Jinni can exist at one time.
Dori’s passive talents
An Eye for Gold
This passive ability unlocks at first ascension. After a character connected to the Jinni triggers an Electro-Charged, Superconduct, Overloaded, Quicken, Aggravate, Hyperbloom, or an Electro Swirl or Crystallize reaction, the CD of Spirit-Warding Lamp: Troubleshooter Cannon is decreased by 1s. This effect can be triggered once every 3s.
Compound Interest
This passive ability unlocks at the fourth ascension. When the Elemental Skill of Dori hit opponents, Dori will restore 5 Elemental Energy for every 100% Energy Recharge possessed. Only one instance of Energy restoration can be triggered and a maximum of 15 Energy can be restored this way, per Spirit-Warding Lamp: Troubleshooter Cannon.
Unexpected Order
This passive ability unlocks automatically. When Dori crafts Character and Weapon Enhancement Materials, she has a chance to refund a portion of the crafting materials used.
Dori’s constellations in Genshin Impact
Additional Investment
- Constellation level: C1
- Effect: The number of After-Sales Service Rounds created by Troubleshooter Shots is increased by 1.
Special Franchise
- Constellation level: C2
- Effect: When you are in combat and the Jinni heals the character it is connected to, it will fire a Jinni Toop from that character’s position that deals 50% of Dori’s ATK DMG.
Wonders Never Cease
- Constellation level: C3
- Effect: Increases the Level of Alcazarzaray’s Exactitude by 3. The maximum upgrade level is 15.
Discretionary Supplement
- Constellation level: C4
- Effect: The character connected to the Jinni will obtain the following buffs based on their current HP and Energy. When their HP is lower than 50%, they gain a 50% Incoming Healing Bonus. When their Energy is less than 50%, they gain a 30% Energy Recharge.
Value for Mora
- Constellation level: C5
- Effect: Increases the level of Spirit-Warding Lamp: Troubleshooter Cannon by 3. The maximum upgrade level is 15.
Sprinkling Weight
- Constellation level: C6
- Effect: Dori gains the following effects for 3s after using Spirit-Warding Lamp: Troubleshooter Cannon. When Normal Attacks hit opponents, all nearby party members will heal HP equivalent to 4% of Dori’s Max HP. This type of healing can occur once every 0.1s.
Best artifacts build for Dori in Genshin Impact
DPS/ sub-DPS build
Dori is most useful as a supporting character with her decent healing abilities. Judging her as a healer for the team, the most perfect equipment for her will be either a 4pc Noblesse Oblige for a team-wide damage benefit or a 4pc Ocean-Hued Clam for some added damage. To make healing stronger, players can use hybrid artifact sets like 2 pieces of Maiden Beloved + 2 pieces of Ocean-Hued Clam.
Depending on the other members of the team, Dori can be armed with either Deepwood Memories or Gilded Dreams in Reaction-based teams and Dendro teams. Her entire set has mixed EM and HP qualities, making her rather difficult to build but also allowing players more team composition options. For additional benefits, Dori can use the Gilded Dreams set, which goes well with her passive abilities.
She can utilize the Deepwood Memories artifact set in Dendro comps; the 2pc effect is useless for her, but the 4pc impact can significantly reduce a target’s Dendro resistance, and utilizing this set on Dori can free up other characters’ artifact sets so they can be more offensive.
Deepwood Memories

2-Pieces: Dendro DMG Bonus +15%.
4-Pieces: After Elemental Skills or Bursts hit opponents, the targets’ Dendro RES will be decreased by 30% for 8s. This effect can be triggered even if the equipping character is not on the field.
Ocean-Hued Clam

2-Piece Bonus: Healing Bonus +15%.
4-Piece Bonus: When the character equipping this artifact set heals a character in the party, a Sea-Dyed Foam will appear for 3 seconds, accumulating the amount of HP recovered from healing (including overflow healing).
At the end of the duration, the Sea-Dyed Foam will explode, dealing DMG to nearby opponents based on 90% of the accumulated healing. This DMG is calculated similarly to Reactions such as Electro-Charged, and Superconduct, but it is not affected by Elemental Mastery, Character Levels, or Reaction DMG Bonuses. Only one Sea-Dyed Foam can be produced every 3.5 seconds. Each Sea-Dyed Foam can accumulate up to 30,000 HP (including overflow healing). There can be no more than one Sea-Dyed Foam active at any given time. This effect can still be triggered even when the character who is using this artifact set is not on the field.
Gilded Dreams

2-Piece Bonus: Elemental Mastery +80
4-Piece Bonus: Within 8s of triggering an Elemental Reaction, the character equipping this will obtain buffs based on the Elemental Type of the other party members, ATK is increased by 14% for each party member whose Elemental Type is the same as the equipping character, and Elemental Mastery is increased by 50 for every party member with a different Elemental Type. Each of the aforementioned buffs will count up to 3 characters. This effect can be triggered once every 8s. The character who equips this can still trigger its effects when not on the field.
Noblesse Oblige

2-Piece Bonus: Elemental Burst DMG +20%
4-Piece Bonus: Using an Elemental Burst increases all party members’ ATK by 20% for 12s. This effect cannot stack.
Artifact stats priority
Min-maxing will always be of the utmost significance in order to maximize any character’s support potential. In order to prioritize whatever sub-stat, Dori mostly uses her Elemental Burst to heal and give reaction utility.
In contrast to the response build, which has EM Sands, EM Goblet, and Circlet that can be based on the stat you need the most, the healer build has HP% Sands, HP% Goblet, and Healing Bonus Circlet. Since her burst plays a crucial role in ideal rotations and serves as the primary utility, you should first try to pass the ER% criterion. Focus on increasing ER%, EM, and HP% as needed after ER% is no longer a problem.
Desired substats: ER% / EM / HP%
| Artifact Type | Main Stat | Sub Stat Priority |
|---|---|---|
| Flower | HP | ER% / EM / HP% > ATK% |
| Plume | ATK | ER% / EM / HP% > ATK% |
| Sands | ER% / EM / HP% | ER% / EM / HP% > ATK% |
| Goblet | HP% / EM | ER% / EM / HP% > ATK% |
| Circlet | Healing Bonus / CR% / CD% | ER% / EM / HP% > ATK% |
ER% requirement for Dori
In order to use her Elemental Burst more frequently without a dedicated battery, Dori needs a lot of ER% on her. This burst is her primary source of healing. The ER% cutoff varies depending on the team comp Dori is utilizing, but to be safe, strive for at least 210+ ER%.
It is considerably simpler for Dori to reach the necessary threshold because she has a wide selection of 4-star Energy Recharge weapons to choose from.
Best weapons for Dori
Since Dori’s Elemental Burst has an energy cost of 80, she usually needs an ER% Claymore in order to use it effectively. Based on the type of role she will play on the squad, Favonius Greatsword and Forest Regalia are both excellent selections for her. The Favonius Greatsword is the ideal weapon for performing the duties of a healer. But it is preferable to utilize the Forest Regalia, which offers extra boosts based on Dendro reactions if she is in a Dendro team or a reaction-based squad.
Dori can also employ weapons like the Skyward Claymore and Sacrificial Greatsword, but these won’t be as effective as the ones mentioned above because Dori doesn’t have as much of a synergy with them.
The Bell is also a poor choice for Dori because it lacks the Sub-stat ER%, which would hasten the burst’s recharging.
Weapon ranking for five-star Weapons
Favonius Greatsword = Forest Regalia > Skyward Claymore = Sacrificial Greatsword > The Bell
Favonius Greatsword
Base ATK- 454(Level – 90)
Substat- 61.3% Energy Recharge
Weapon Passive: Windfall
CRIT hits have a 60% chance to generate a small number of Elemental Particles, which will regenerate 6 Energy for the character. Can only occur once every 12s.
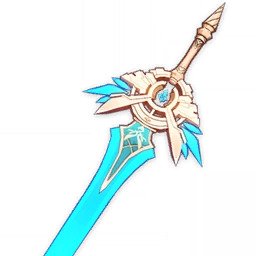
Forest Regalia

Base ATK- 565(Level – 90)
Substat- 30.6% Energy Recharge
Weapon Passive: Forest Sanctuary
After triggering Burning, Quicken, Aggravate, Spread, Bloom, Hyperbloom, or Burgeon, a Leaf of Consciousness will be created around the character for a maximum of 10s. When picked up, the Leaf will grant the character 60 Elemental Mastery for 12s. Only 1 Leaf can be generated this way every 20s. This effect can still be triggered if the character is not on the field. The Leaf of Consciousness’ effect cannot stack.
Skyward Blade
Base ATK- 608(Level – 90)
Substat- 55.1% Energy Recharge
Weapon Passive: Sky-Piercing Fang
CRIT Rate increased by 4%. Gains Skypiercing Might upon using an Elemental Burst: Increases Movement SPD by 10%, increases ATK SPD by 10%, and Normal and Charged hits deal additional DMG equal to 20% of ATK. Skypiercing Might lasts for 12s.
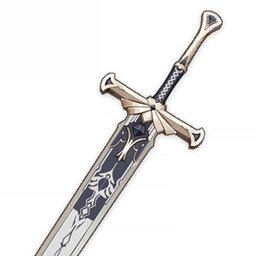
Sacrificial Greatsword
Base ATK- 565(Level – 90)
Substat- 40.6% Energy Recharge
Weapon Passive: Composed
After dealing damage to an opponent with an Elemental Skill, the skill has a 40% chance to end its own CD. Can only occur once every 30s.
The Bell
Base ATK- 510(Level – 90)
Substat- 41.3% HP
Weapon Passive: Rebellious Guardian
Taking DMG generates a shield that absorbs DMG up to 20% of max HP. This shield lasts for 10s or until broken, and can only be triggered once every 45s. While protected by a shield, the character gains 12% increased DMG.
Dori materials requirement for ascension
The materials required for Dori’s leveling and ascension all the way to max level 90.
| Ascension Level | Ascension Materials |
|---|---|
| Level: 0-20 | 1x Vajrada Amethyst Silver, 3x Faded Red Satin, 3x Kalpalata Lotus, 20k Mora |
| Level: 20-40 | 3x Vajrada Amethyst Fragment, 2x Thunderclap Fruitcore, 15x Faded Red Satin, 10x Kalpalata Lotus, 40k Mora |
| Level: 40-50 | 6x Vajrada Amethyst Fragment, 4x Thunderclap Fruitcore, 12x Trimmed Red Silk, 20x Kalpalata Lotus, 60k Mora |
| Level: 50-60 | 3x Vajrada Amethyst Chunk, 8x Thunderclap Fruitcore, 18x Trimmed Red Silk, 30x Kalpalata Lotus, 80k Mora |
| Level: 60-70 | 6x Vajrada Amethyst Chunk, 12x Thunderclap Fruitcore, 12x Rich Red Brocade, 45x Kalpalata Lotus, 100k Mora |
| Level: 70-80+ | 6x Vajrada Amethyst Gemstone, 20x Thunderclap Fruitcore, 24x Rich Red Brocade, 60x Kalpalata Lotus, 120k Mora |
Dori talent upgrade materials
Materials required for leveling up skill talents.
| Level Target | Materials Required |
|---|---|
| Level 1 | |
| Level 2 | 3x Teachings of Ingenuity, 6x Faded Red Satin, x12500 Mora |
| Level 3 | 2x Guide to Ingenuity, 3x Trimmed Red Silk, x17500 Mora |
| Level 4 | 4x Guide to Ingenuity, 4x Trimmed Red Silk, x25000 Mora |
| Level 5 | 6x Guide to Ingenuity, 6x Trimmed Red Silk, x30000 Mora |
| Level 6 | 9x Guide to Ingenuity, 9x Trimmed Red Silk, x37500 Mora |
| Level 7 | 4x Philosophies of Ingenuity, 4x Rich Red Brocade, 1x Bloodjade Branch, x120000 Mora |
| Level 8 | 6x Philosophies of Ingenuity, 6x Rich Red Brocade, 1x Bloodjade Branch, x260000 Mora |
| Level 9 | 12x Philosophies of Ingenuity, 9x Rich Red Brocade, 2x Bloodjade Branch, x450000 Mora |
| Level 10 | 16x Philosophies of Ingenuity, 12x Rich Red Brocade, 2x Bloodjade Branch, 1x Crown of Insight, x700000 Mora |
Genshin Impact Dori Special Dish
Show Me the Mora
In-game Description: Dori’s specialty. After paying a large sum of Mora, you finally got a chance to taste the dish cooked by Lord Sangemah Bay herself. Firm chicken is covered in silky sauce with a smooth texture. With the mind-controlling charm of its great flavor, this dish is spurring an impulse in you to spend another fortune just to get another bite!
Food Effect: Increases all party members’ ATK by 274 for 300s. In Co-op Mode, this effect only applies to your own character(s).
What are your thoughts on our complete guide about Dori? Comment down below!
Follow Daily Meta Dose on Twitter, Instagram, and LinkedIn, or join on Telegram channel for all the latest updates on Video Games, Movies, TV Series, Anime, and more!